Discovering HELM, a package manager for Kubernetes

I’ve been using Kubernetes for a while now, but I never took the opportunity to have a look at Kubernetes’ most popular package manager: Helm. Every developer knows how tedious the process of installing, removing, upgrading, configuring software, dependencies, tools was before package managers existed. I’ve been using package managers like npm or yarn for front-end code and Maven with mvn repository or Gradle for Java projects. Given the major release to v3 last month and our plan to move to Jenkins X, I decided to finally take a look at this magic tool and share it with you. I assume you have some kubernetes background.
Jenkins X
At Design Is Dead we are using automated software delivery pipelines for all our projects. Our toolset consists of many industry standards like Git, Bitbucket, Maven, Jenkins, Ansible, Selenium…
It’s important we keep this toolset up to date. Currently, we are evaluating Jenkins X to accelerate delivery pipelines of our customers.
Jenkins X uses an API first approach and embraces external tools like Helm, to do Configuration-as-Code.
Warning: At the time of writing, Jenkins X’s jx boot command fails with Helm v3.
If you plan to use Helm v3 with Jenkins X, we encourage you to follow up https://github.com/jenkins-x/jx/issues/6124 closely.
HELM in a nutshell
HELM is a package manager and operations tool that runs on Kubernetes.
You build Helm packages: a package is defined by a chart. Charts contain kubernetes objects like volumes, services, pods, deployments etc. These chart files are written in Yaml.
Helm charts are stored inside a Helm repository. The HELM community provides a public repository with some ready-to-go charts. (great to get started)
When we install a chart to the kubernetes cluster, a new instance/release of our package is created.
Installing Helm v3
If you are on a unix subsystem(linux/mac), I found the easiest way is to use the provided installer script.
Download the helm script

$ curl https://raw.githubusercontent.com/helm/helm/master/scripts/get-helm-3 > get_helm.sh

Make sure you can execute the script

$ chmod 700 get_helm.sh

Run the install script

$ ./get_helm.sh

Check if it’s working

$ helm version
Done. If needed; other installation methods are described here.
Helm init… right?
For those being used to working with an older version of Helm, now would be the time to create a service account on their platform for the server-side component (“tiller”)?
However, that won’t be needed.
One of the major changes in v3 is the removal of the tiller. Previously, there were two major parts. The CLI (client) and Tiller (server). The tiller component was introduced in HELM v2 and ran on your kubernetes cluster, serving as an interface between the CLI and Kubernetes API.
The initial problem that surfaced was that the tiller component ran with root access, imposing a security risk. A workaround has been provided by using SSL between CLI and Tiller, but it was not easy to configure.
The kubernetes community was quick to find a workaround called Tillerless setup via the Tillerless Helm v2 plugin.
However, with the v3 release, the tiller is removed and the CLI uses the current user’s Kubernetes RBAC.
Simply put, the security model has been greatly simplified. But if you are new to Helm and encounter this tiller on the internet, you know they are talking about an older version of Helm.
Deploying your first chart
Running helm commands
The helm client you just installed is very easy to use. You type “helm” followed by a verb, which is a command. Each command can have flags.
$ helm

Usage:

helm [command]

Available Commands:

completion  Generate autocompletions script for the

specified shell (bash or zsh)
create      create a new chart with the given name
dependency  manage a chart's dependencies
env         Helm client environment information
get         download extended information of a named release
help        Help about any command
history     fetch release history
install     install a chart
....
Repositories: The happy place for charts
We already mentioned charts are stored inside a chart repository. It’s the Helm client that packs your chart and puts it into the repository. Also via the client, we can retrieve packages from a repository.
Let’s see which repo’s we already have available on our local client:
$ helm search repo
Error: no repositories configured
Out of luck? Since v3, by default, you have no repositories installed. Let’s add one. But where to find them?
To the Helm Hub! Your one-stop-shop for awesome charts in hundreds of repositories. Great to get started!

Let’s have a closer look at which kind of repositories there are.
There are charts residing in the stable repository. Charts that are not stable yet are in the incubator repository. Next to those you have a bunch of community charts.
Be aware that with the GA of Helm v3 new charts can’t be added any more to stable or incubator. In May 2020, the stable and incubator repositories will be de-listed. In the coming months, charts will be moved to new Helm repos, which will be listed in new repositories on the hub.
Installing a chart
Ok, let’s go for something familiar. Let’s check the hub if there are charts for Jenkins. You can use the UI or the search hub command as seen below.
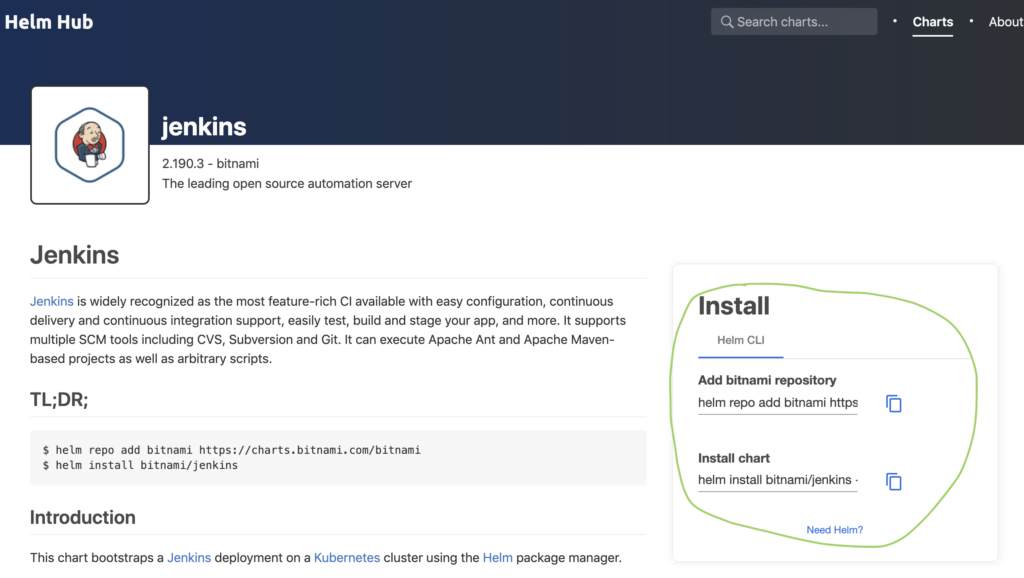
$ helm search hub jenkins

URL CHART VERSION APP VERSION DESCRIPTION

https://hub.helm.sh/charts/bitnami/jenkins 4.1.0 2.190.3
The leading open source automation server...
Let’s pick the bitnami Jenkins chart and adds it’s repository.
$ helm repo add bitnami https://charts.bitnami.com
“bitnami” has been added to your repositories
Installing charts is done by specifying the “install” command in the helm client.
- You can specify an optional version. If you don’t specify, the latest stable release will be taken. We’ll deploy version 4.0.4.
- You can name the deployment, or let helm generate a name for the deployment with the — generate-name option. Prior to v3, the install command would automatically generate a name, this is not the case anymore.
$ helm install my-jenkins-release bitnami/jenkins --version 4.0.4

NAME: my-jenkins-release
LAST DEPLOYED: Tue Dec 17 22:17:52 2019
NAMESPACE: default
STATUS: deployed
REVISION: 1
TEST SUITE: None
NOTES:** Please be patient while the chart is being deployed **
After running the install command, all defined kubernetes objects inside this Helm chart are being deployed on the kubernetes cluster.
Ok, that’s great but what the frack did we install?
You’re right, we installed a Helm chart but we haven’t taken the time yet to have a look at the components that were actually defined for this deployment.
Let’s go through the structure of our Jenkins helm chart project.
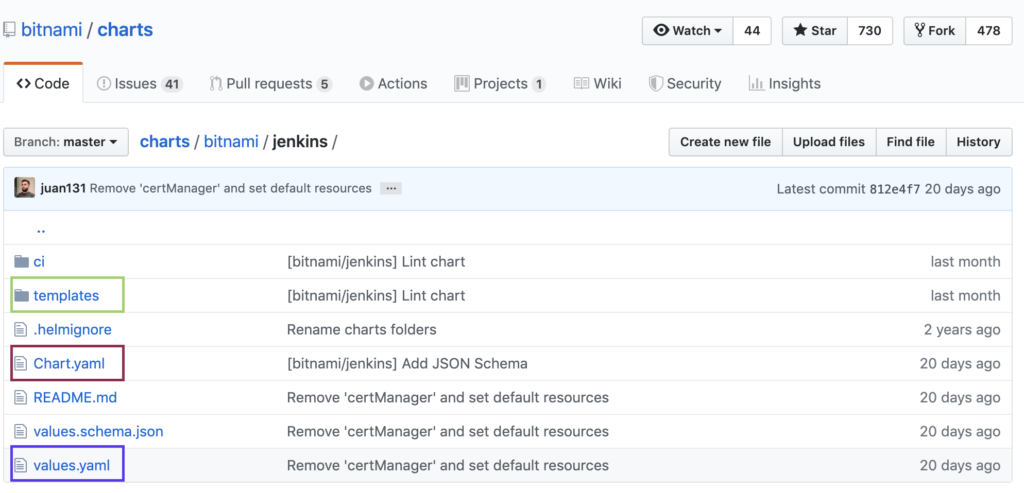
This chart is following the typical, and recommended, the structure of a Helm chart.
The templates directory contains template files. Inside this directory, you see yaml files you are used to having when dealing with kubernetes. For example definitions for services, deployment, persistent volume claims, etc…
The only difference is that you see templating language placeholders (based on Go templating language)
apiVersion: {{ template “jenkins.deployment.apiVersion” . }}
kind: Deployment
metadata: name: {{ template “jenkins.fullname” . }}
labels: {{- include “jenkins.labels” . | nindent 4 }}
When a Helm package is installed, it will dynamically fill in the placeholders based on parameter files and create the kubernetes objects that are defined. The chart.yaml file describes the chart. The values in this file can be used inside template files. values.yaml contains default values for a chart. These values can be used inside template files and can be overridden by specifying their names with another value via some helm commands (e.g helm install)
Checking the k8s objects
After a few minutes, the main jenkins pod will become ready. Let’s do some checks.
$ kubectl get pod --watch

NAME READY STATUS RESTARTS AGE
my-jenkins-release 1/1 Running 0 7m25s
$ kubectl logs my-jenkins-releaseWelcome to the Bitnami jenkins container
...
nami    INFO  jenkins successfully initializedactory@33f5d505:
defining beans [filter,legacy]; root of factory hierarchy

2019-12-17 21:20:07.150+0000 [id=26] INFO jenkins.InitReactorRunner$1
#onAttained: Completed initialization

2019-12-17 21:20:07.206+0000 [id=19] INFO hudson.WebAppMain$3
#run: Jenkins is fully up and running
We can now check the kubernetes objects that have been created by this Helm chart.
Deployment
$ kubectl get deployments

NAME                 READY   UP-TO-DATE   AVAILABLE
AGEmy-jenkins-release   1/1     1            1           47m
Let’s have a closer look at the template file and the actual object to see how values defined in the values.yaml file is parsed into the deployment.yaml template.
$ kubectl get deployment my-jenkins-release  --output yaml

apiVersion: extensions/v1beta1
kind: Deployment
metadata:
 annotations:deployment.kubernetes.io/revision:
“1”
creationTimestamp: “2019–12–17T21:17:52Z”
generation: 1
labels:
 app: jenkins
 chart: jenkins-4.1.0...
resourceVersion: “269627”...

containers:
- name: jenkins
   image: {{ template "jenkins.image" . }}
   imagePullPolicy: {{ .Values.image.pullPolicy | quote }}
See the containers section above. The placeholder for jenkins.image and Values.image.pullPolicy are replaced by values defined in values.yaml.
image:
 registry: docker.io
 repository: bitnami/jenkins
 tag: 2.190.3-debian-9-r0
 pullPolicy: IfNotPresent
source files:
https://github.com/bitnami/charts/blob/master/bitnami/jenkins/templates/deployment.yaml
https://github.com/bitnami/charts/blob/master/bitnami/jenkins/values.yaml
Service
and it seems a service has been deployed of type LoadBalancer, which means we are exposing this service onto an external IP address, that’s outside of our cluster, on port 80.
$ kubectl get svc

NAME TYPE CLUSTER-IP EXTERNAL-IP PORT(S) AGE
my-jenkins-release   LoadBalancer   10.100.183.56   <pending>     80:30581/TCP,443:32469/TCP   47m
If we have a look inside our services (svc) template, we can see the type is taken from the values.yaml. You can see that there is even support for conditional checks in the templating language.
apiVersion: v1
 kind: Servicemetadata:
 name: {{ template "jenkins.fullname" . }}
 labels: {{- include "jenkins.labels" . |
 nindent 4 }} {{- if .Values.service.annotations }}

 annotations: {{ include "jenkins.tplValue" ( dict "value" .
  Values.service.annotations "context" $) | nindent 4 }} {{- end }}
 spec:
  type: {{ .Values.service.type }} {{- if or (eq   .Values.service.type
"LoadBalancer") (eq .Values.service.type "NodePort") }}

externalTrafficPolicy: {{ .Values.service.externalTrafficPolicy | quote }}
{{- end }} {{- if and (eq .Values.service.type "LoadBalancer")
(not (empty .Values.service.loadBalancerIP)) }}

loadBalancerIP: {{ .Values.service.loadBalancerIP }} {{- end }}
from values.yaml:
service:
  ## Service type
  ##
  type: LoadBalancer
Persistence Volume
And we also have a PersistentVolume of 8Gi.
$ kubectl get pv

NAME CAPACITY   ACCESS MODES   RECLAIM POLICY   STATUS   CLAIM STORAGECLASS   REASON   AGE
pvc-af8a3208-2112-11ea-a7aa-025000000001   8Gi        RWO            Delete           Bound    default/my-jenkins-release  hostpath 47m
which seems also to be defined in the values.yaml file, and again, referenced in charts/pvc.yaml.
persistence:
 enabled: true
 accessModes:
   - ReadWriteOnce
 ## Persistent Volume size
 size: 8Gi
kind: PersistentVolumeClaim
apiVersion:
v1metadata:
name: {{ template "jenkins.fullname" . }}
labels: {{- include "jenkins.labels" . | nindent 4 }}
annotations: volume.alpha.kubernetes.io/storage-
class: {{ ternary "default" (trimPrefix "storageClassName: "
(include "jenkins.storageClass" .))
(empty (include "jenkins.storageClass" .)) }}Pretty straightforward and clean. You can check the same for all kubernetes objects that are defined in the chart.
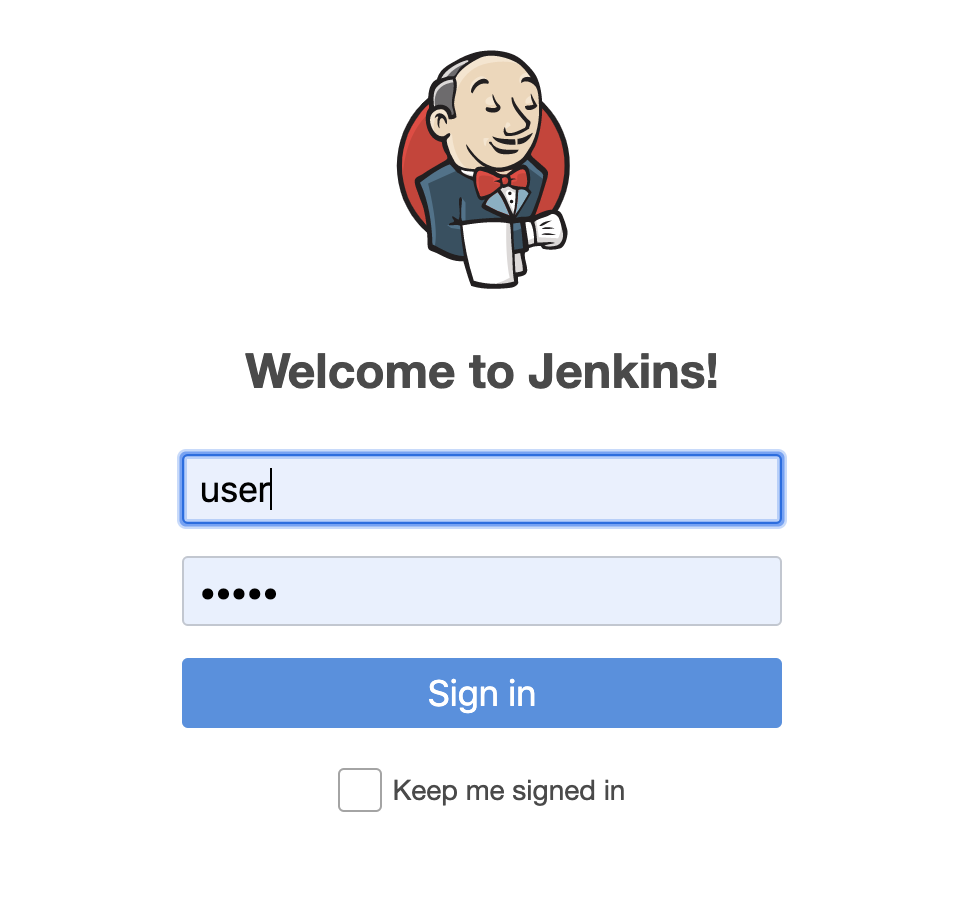
Finally, let’s check if Jenkins is running. Seems we’re up and running on localhost:80.
Upgrading a release
We can change a release by specifying the upgrade command to helm. Let’s, for example, change the service port to serve on 9090. There are multiple options to do this.
Option 1: You make changes inside your project: update your chart files and running the upgrade.
Since we didn’t bother to fork the project, not really usable now.
$ helm upgrade my-deployment stable/xxxOption 2: use a local file to override
$ vi myvalues.yaml
service:
 port: 9090
$ helm upgrade -f myvalues.yaml my-jenkins-release bitnami/jenkins
Release "my-jenkins-release" has been upgraded. Happy Helming!
NAME: my-jenkins-release
STATUS: deployed
...
Option 3: overriding values using the set option
$ helm upgrade --set service.port=9090 my-jenkins-release  bitnami/jenkins
Release "my-jenkins-release" has been upgraded. Happy Helming!
NAME: my-jenkins-release
STATUS: deployed
...
Let’s go for option 3, which is the fastest. The message above indicated our release was upgraded. Let’s check if our service is exposing the other port now.
$ kubectl get svc

NAME TYPE CLUSTER-IP EXTERNAL-IP PORT(S) AGE
my-jenkins-release LoadBalancer 10.100.183.56 localhost 9090:30703/TCP,443:32469/TCP 13h
You can also query the history of your releases:
$ helm history my-jenkins-release

REVISION UPDATED STATUS CHART APP VERSION DESCRIPTION

1 Thu Dec 19 13:38:21 2019 superseded jenkins-4.0.4 2.190.3
Install complete

2 Thu Dec 19 13:52:16 2019 deployed   jenkins-4.1.0 2.190.3
Upgrade complete
That’s nice, we see the revision number, status, chart, etc.
Also notice, my chart was automatically updated to a newer version. (4.0.4 -> 4.1.0)
What happened? This is because the upgrade command will take a fresh chart from the repository and we didn’t specify the version option again. Let’s try again.
$ helm upgrade my-jenkins-release bitnami/jenkins --version=4.0.4If you want to see more details about the changes in our revision you can use the get values command, and optionally specify a revision id.
$ helm get value --revision=2 my-jenkins-release
USER-SUPPLIED VALUES:
service:
port: 9090
Rolling back a release
Ok let’s rollback, but to which release? The history command tells us which revisions we have.
$ helm history my-jenkins-release

REVISION UPDATED                STATUS     CHART         APP VERSION DESCRIPTION

1 Thu Dec 19 13:38:21 2019 superseded jenkins-4.0.4 2.190.3
Install complete

2 Thu Dec 19 13:52:16 2019 superseded jenkins-4.1.0 2.190.3
Upgrade complete

3 Thu Dec 19 13:59:56 2019 deployed   jenkins-4.0.4 2.190.3
Upgrade complete
Let’s revert to the initial revision. Revision 1.
$ helm rollback my-jenkins-release 1
Rollback was a success! Happy Helming!

$ helm history my-jenkins-release --max=2

REVISION UPDATED                  STATUS     CHART         APP VERSION DESCRIPTION

3 Thu Dec 19 13:59:56 2019 superseded jenkins-4.0.4 2.190.3     Upgrade complete
4 Thu Dec 19 14:06:51 2019 deployed   jenkins-4.0.4 2.190.3     Rollback to 1
Secrets… Helm’s release management in k8s
Ok, works like a charm… but how can we so quickly switch revisions? How is Helm’s release management stored in k8s then? Where is it stored?
For each release we did via Helm, a new release secret was created. Our initial install, upgrade and rollbacks are reflected here in the secrets on our k8s cluster:
$ kubectl get secrets

NAME TYPE DATA AGE
my-jenkins-release Opaque 1 43m
sh.helm.release.v1.my-jenkins-release.v1 helm.sh/release.v1 1 43m
sh.helm.release.v1.my-jenkins-release.v2 helm.sh/release.v1 1 29m
sh.helm.release.v1.my-jenkins-release.v3 helm.sh/release.v1 1 22m
sh.helm.release.v1.my-jenkins-release.v4 helm.sh/release.v1 1 15m
sh.helm.release.v1.my-jenkins-release.v5 helm.sh/release.v1 1 6m30s
When we query the details about a specific release, we can spot the release value, which contains the release in an encrypted form.
$ kubectl get secret sh.helm.release.v1.my-jenkins-release.v5 -o yaml
apiVersion: v1
data:
release: SDRzSUFBQUFBQUFDLyt5OWVaT2pTTFl2K0ZWa212Zkh1ejJSbV...
kind: Secret
metadata:
creationTimestamp: “2019–12–19T13:15:38Z”
labels:
modifiedAt: “1576761338”
name: my-jenkins-release
owner: helm
status: deployed
version: “5”
name: sh.helm.release.v1.my-jenkins-release.v5
namespace: default
resourceVersion: “321311”

selfLink:
/api/v1/namespaces/default/secrets/sh.helm.release.v1.my-jenkins-release.v5
uid: a60d2c1c-2261–11ea-a7aa-025000000001
type: helm.sh/release.v1
Uninstalling a complete chart
All objects that were installed via your Chart can be uninstalled from your k8s cluster using the delete command, followed by your deployment name.
$ helm delete my-jenkins-releaseConclusion
We went through some basics on Helm, and as you can see it’s intuitive and easy to use. In a follow-up blog post, we’ll dive deeper and go through the steps of migrating an existing Kubernetes application into Helm charts on GKE.
Happy Helming!